

Build Run and Deploy Docker image with Terraform

Introduction
In this blog we are going to look about docker and terraform how your can deploy docker server and also upload your docker images on your own docker hub account with in a minutes with AWS
In today's fast-paced world of software development and deployment, automation is key to efficiency and scalability. Docker has revolutionized the way we build, ship, and run applications by packaging them into lightweight, portable containers. Amazon Web Services (AWS) is a popular cloud platform offering a wide range of services for hosting and managing applications. In this tutorial, we'll explore how to leverage Terraform, an Infrastructure as Code (IaC) tool, to automate the deployment of Docker containers on AWS.
Code Explanation
# configured aws provider with proper credentials
provider "aws" {
  region     = var.region
  access_key = var.access_key
  secret_key = var.secret_key
}
Here, we configure the AWS provider with the necessary credentials. We specify the AWS region and access keys using variables for flexibility and security.
# create default vpc if one does not exit
resource "aws_default_vpc" "default_vpc" {
  tags = {
    Name = "default vpc"
  }
}
This block creates a default Virtual Private Cloud (VPC) if one doesn't already exist. We assign a name tag to the default VPC for identification purposes.
# use data source to get all available zones in region
data "aws_availability_zones" "available_zones" {}
Here, we use a data source to retrieve information about all available availability zones in the specified AWS region.
# create default subnet if one does not exist
resource "aws_default_subnet" "default_az1" {
  availability_zone = data.aws_availability_zones.available_zones.names[0]

  tags = {
    Name = "default subnet"
  }
}
This block creates a default subnet if one doesn't already exist. We assign the first availability zone from the data source to the subnet and tag it accordingly.
# create security group for the ec2 instance
resource "aws_security_group" "ec2_security_group" {
  // Configuration for security group allowing HTTP and SSH access
}
Here, we define a security group for the EC2 instance. We specify rules allowing inbound access on ports 80 (HTTP) and 22 (SSH) from any IP address.
# use data source to get a registered amazon linux 2 ami
data "aws_ami" "amazon_linux_2" {
  // Configuration to retrieve latest Amazon Linux 2 AMI
}
This block uses a data source to retrieve information about the latest Amazon Linux 2 AMI. We filter for the AMI owned by Amazon to ensure its authenticity.
# launch the ec2 instance
resource "aws_instance" "ec2_instance" {
  // Configuration for launching EC2 instance
}
Here, we launch an EC2 instance using the specified Amazon Linux 2 AMI, instance type, subnet, security group, and key pair.
# an empty resource block
resource "null_resource" "name" {
  // Configuration for provisioning the EC2 instance
}
This null resource block is used for executing provisioners. We define provisioners to copy files (e.g., Dockerfile, shell scripts) to the EC2 instance and execute commands remotely.
# print the URL of the container
output "container_url" {
  value = join("", ["http://", aws_instance.ec2_instance.public_dns])
}
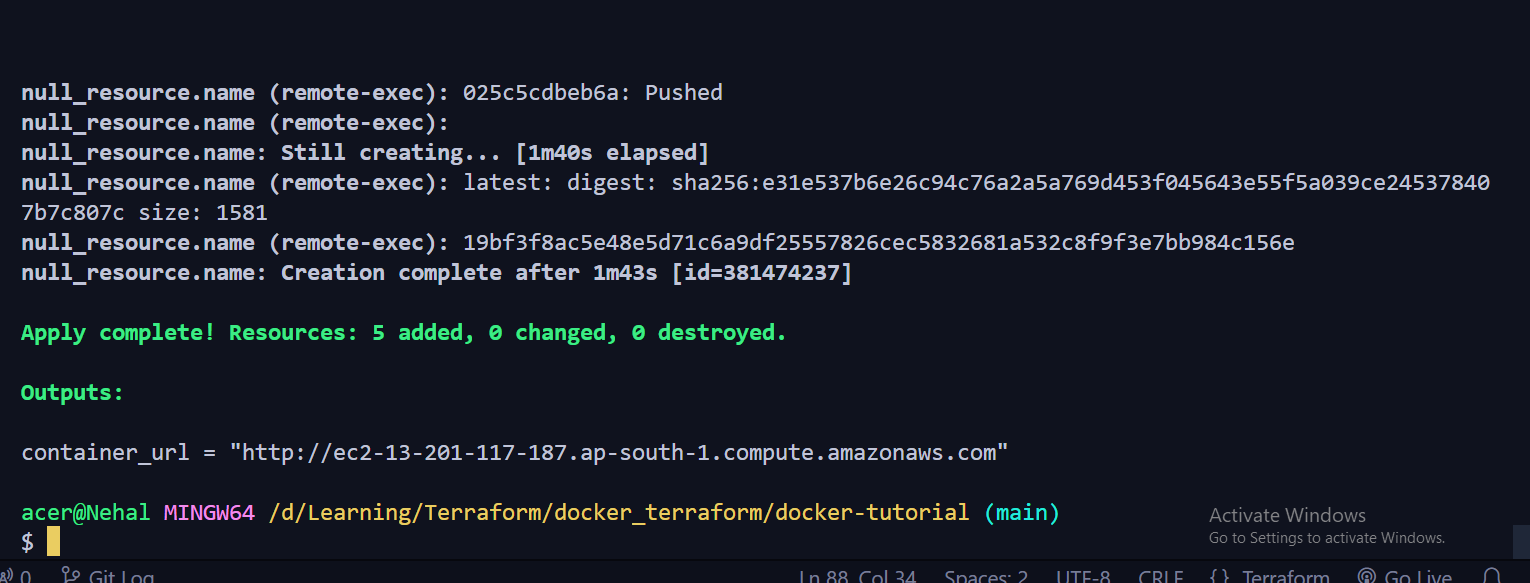
Finally, we output the URL of the container by joining "http://" with the public DNS of the EC2 instance. This allows us to access the deployed application.
Explanation of Docker file
FROM amazonlinux:latest

# Install dependencies
RUN yum update -y && \
    yum install -y httpd && \
    yum search wget && \
    yum install wget -y && \
    yum install unzip -y
In this section, we start with the amazonlinux:latest base image and update the package repositories. Then, we install Apache HTTP Server (httpd), wget, and unzip, which are required dependencies for our web server setup.
# change directory
RUN cd /var/www/html
Here, we change the working directory to /var/www/html, where the web server will serve files from.
# download webfiles
RUN wget https://github.com/azeezsalu/techmax/archive/refs/heads/main.zip
We use wget to download a ZIP file containing our web application files from a GitHub repository.
# unzip folder
RUN unzip main.zip
This command unzips the downloaded ZIP file, extracting the contents into a directory named techmax-main.
# copy files into html directory
RUN cp -r techmax-main/* /var/www/html/
Here, we copy the contents of the techmax-main directory into the Apache document root (/var/www/html/), making them accessible to the web server.
# remove unwanted folder
RUN rm -rf techmax-main main.zip
We clean up by removing the downloaded ZIP file and the extracted directory, as they are no longer needed in the container.
# exposes port 80 on the container
EXPOSE 3000
This line specifies that the container will listen on port 3000. However, it's worth noting that this does not actually publish the port; it's merely a documentation of which ports are intended to be published.
# set the default application that will start when the container start
ENTRYPOINT ["/usr/sbin/httpd", "-D", "FOREGROUND"]
Finally, we set the entry point for the container to start the Apache HTTP Server (httpd) in the foreground when the container starts. This command starts the web server and keeps the container running.
Script file
1. Create a Docker Image: First, we'll create a Docker image that contains our web application. Here's the Dockerfile:
# Dockerfile
FROM amazonlinux:latest

# Install dependencies
RUN yum update -y && \
    yum install -y httpd && \
    yum search wget && \
    yum install wget -y && \
    yum install unzip -y

# Download web files
RUN wget https://github.com/azeezsalu/techmax/archive/refs/heads/main.zip

# Unzip folder
RUN unzip main.zip

# Copy files into html directory
RUN cp -r techmax-main/* /var/www/html/

# Remove unwanted folder
RUN rm -rf techmax-main main.zip

# Expose port 80
EXPOSE 80

# Set the default application that will start when the container starts
ENTRYPOINT ["/usr/sbin/httpd", "-D", "FOREGROUND"]
2. Build the Docker Image: Now, we'll build the Docker image using the following command:
docker build -t nehal .
3. Push the Image to Docker Hub: To push the Docker image to Docker Hub, follow these steps:
- Login to Docker Hub:
echo 'Password_docker' | docker login --username nehal71 --password-stdin
- Tag the image with your Docker Hub username and repository name:
docker tag nehal nehal71/website:latest
- Push the image to Docker Hub:
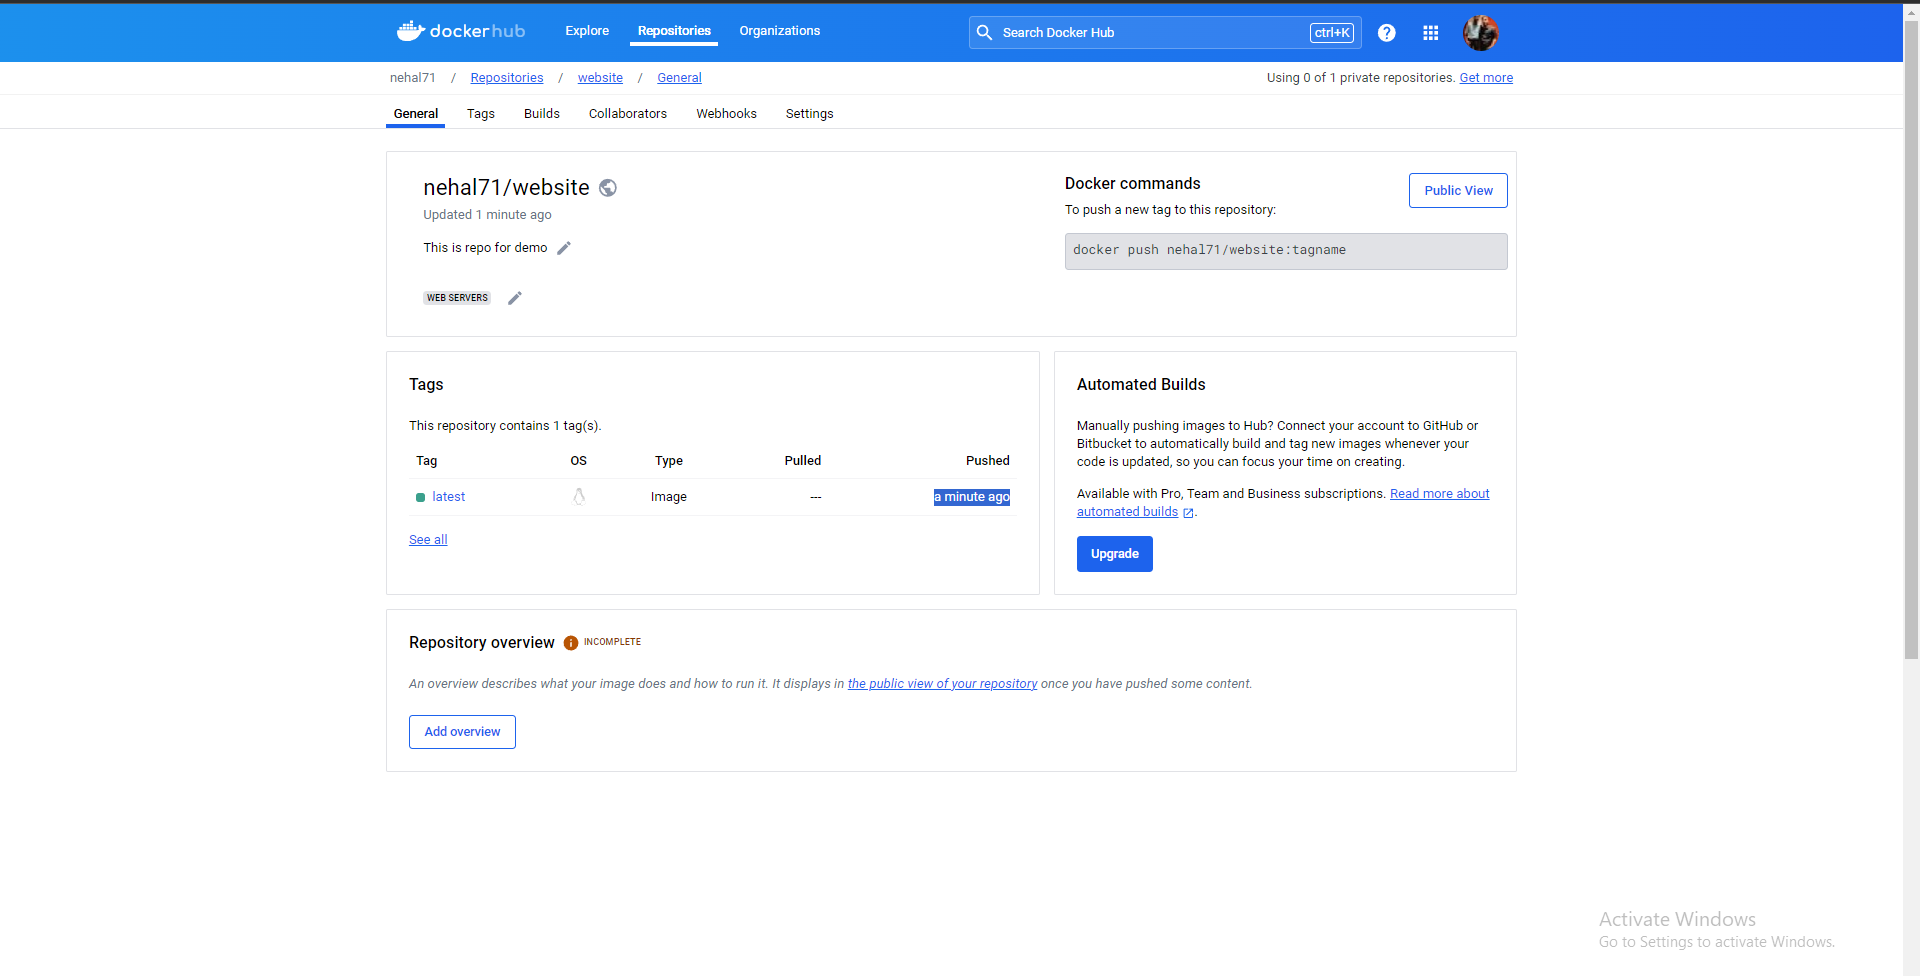
docker push nehal71/website:latest
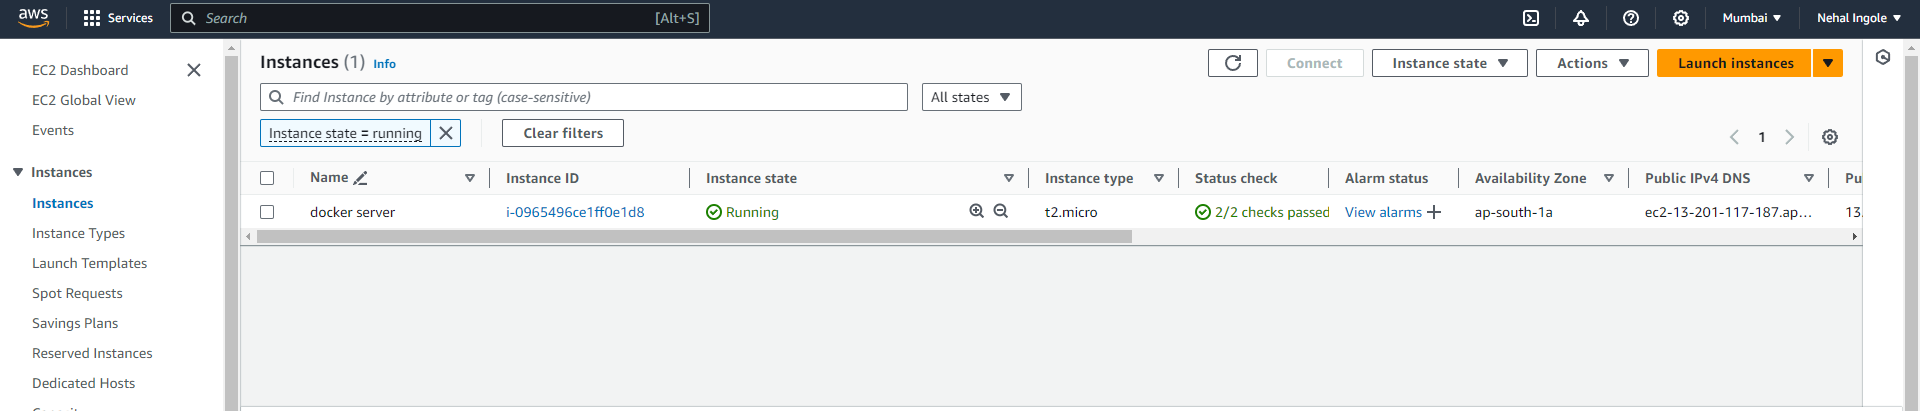
4. Launch an EC2 Instance: Launch an EC2 instance with security group settings to allow traffic on ports 80 and 22.
5. Install and Configure Docker on EC2: SSH into the EC2 instance and run the following commands to install and configure Docker:
sudo yum update -y
sudo amazon-linux-extras install docker -y
sudo service docker start
sudo systemctl enable docker
sudo usermod -a -G docker ec2-user
6. Run the Docker Image on EC2: Finally, run the Docker image on the EC2 instance using the following command:
docker run -d -p 3000:80 nehal71/website:latest
This command starts the Docker container in detached mode, mapping port 3000 on the host to port 80 in the container.
Result
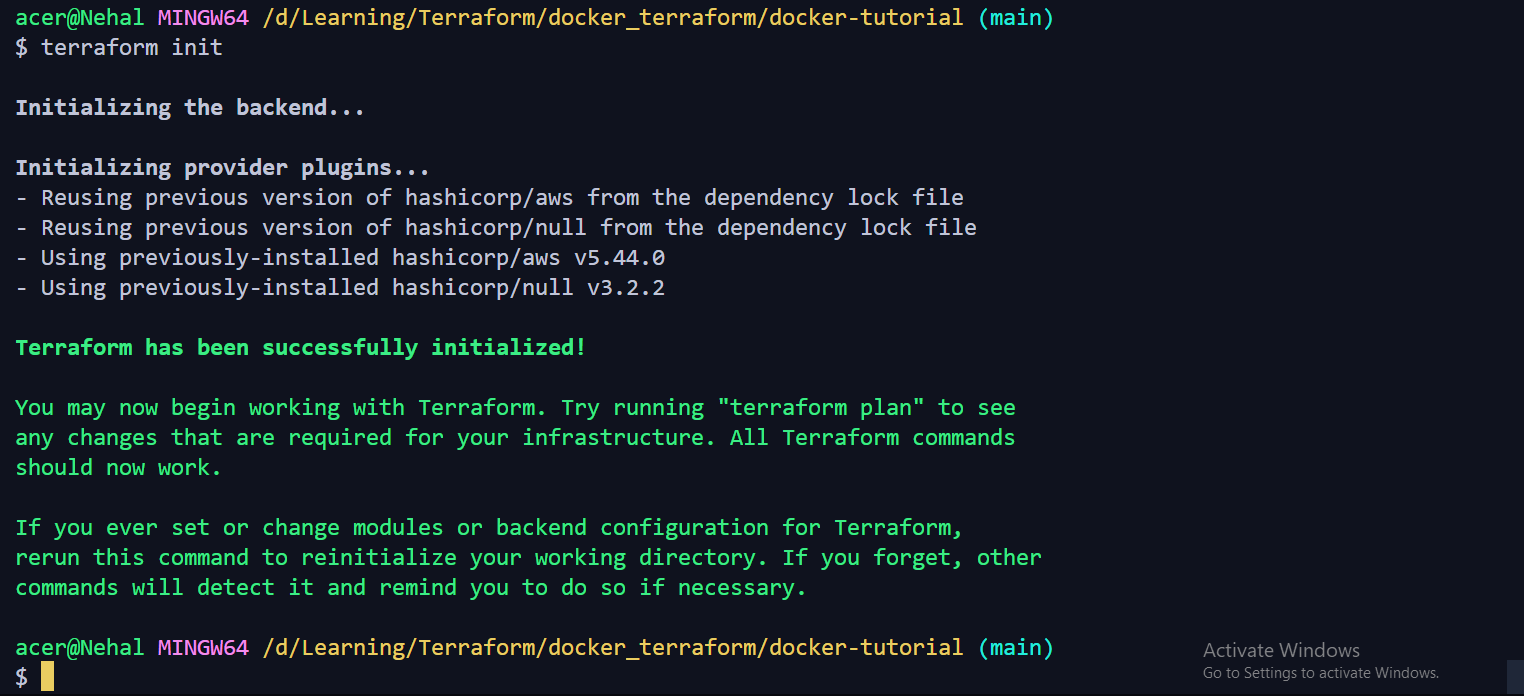
Terraform init
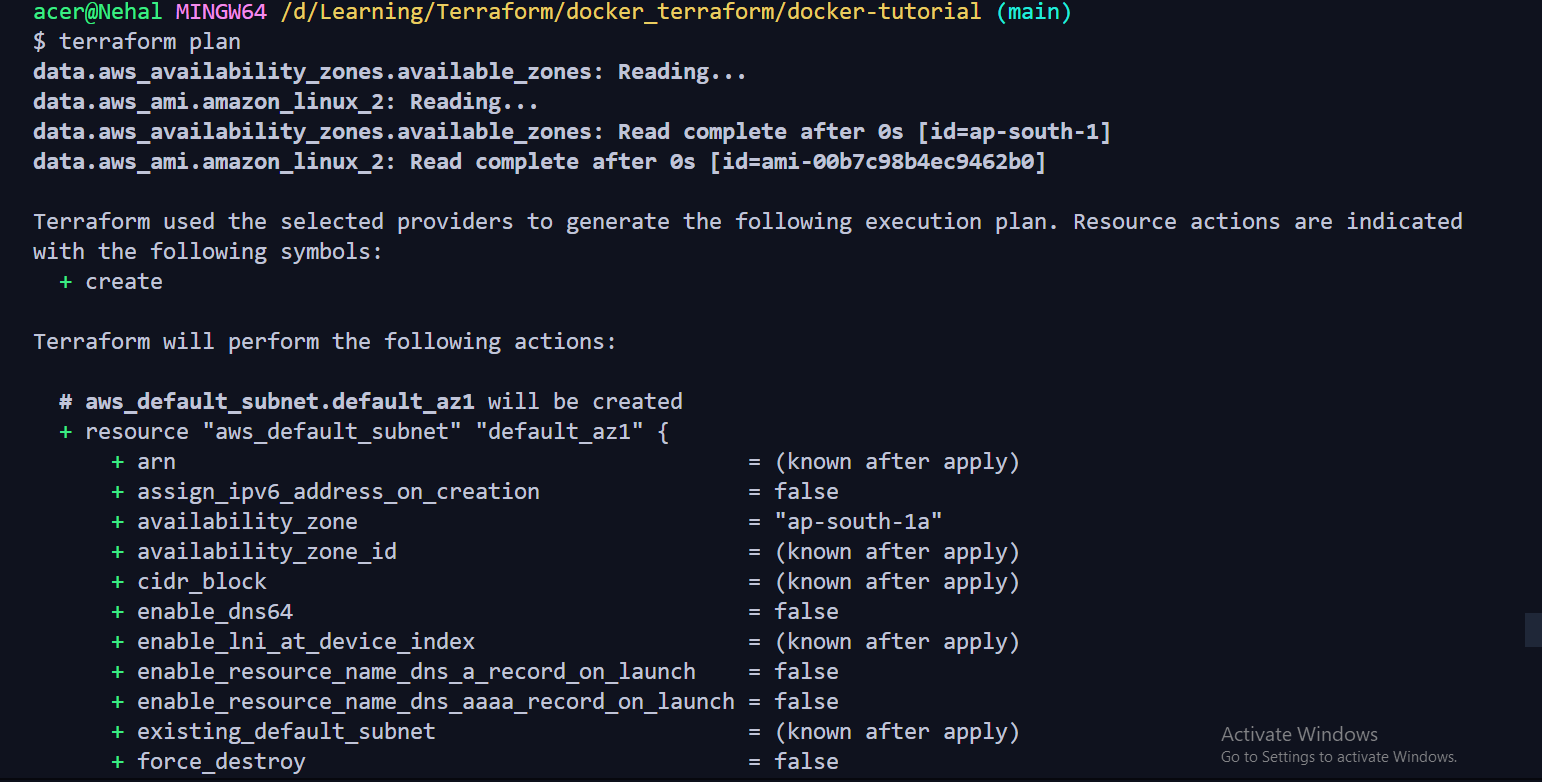
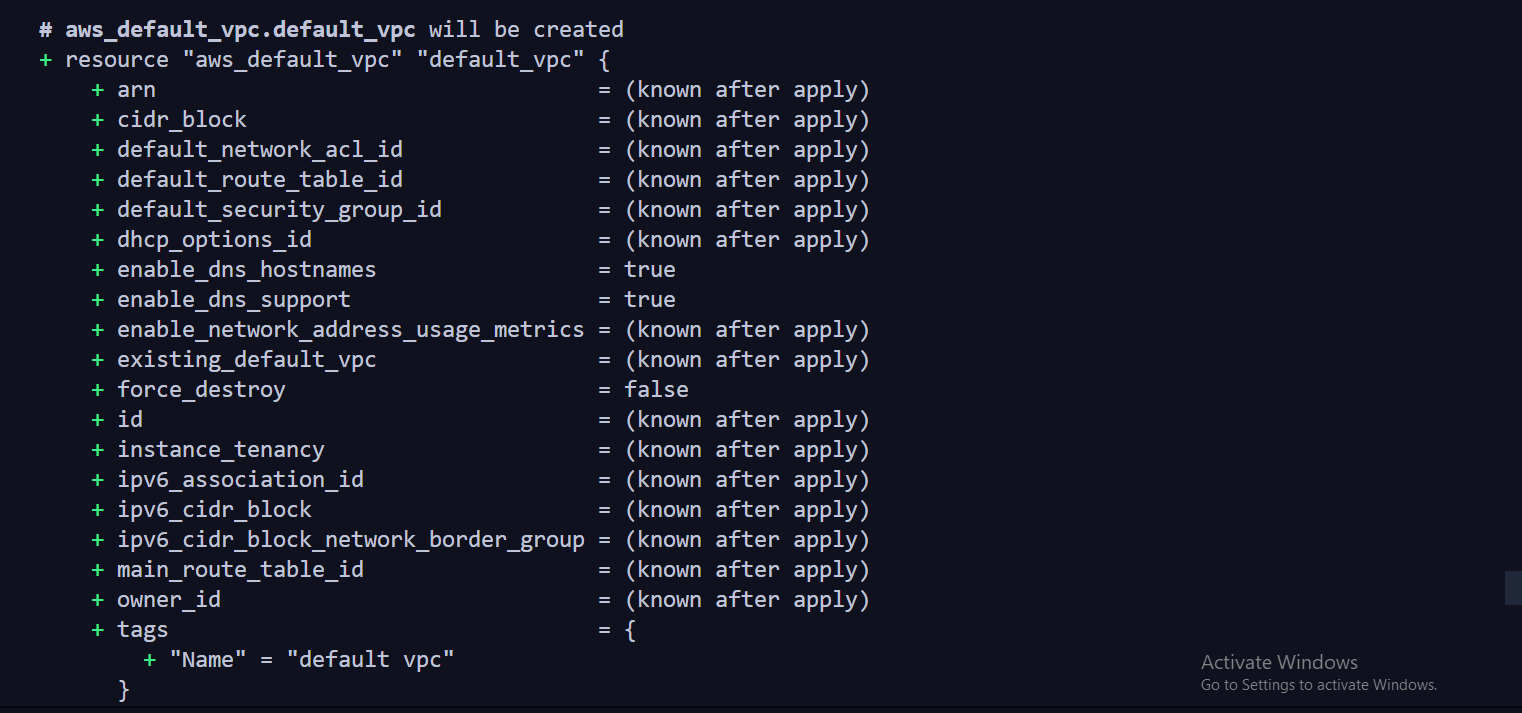
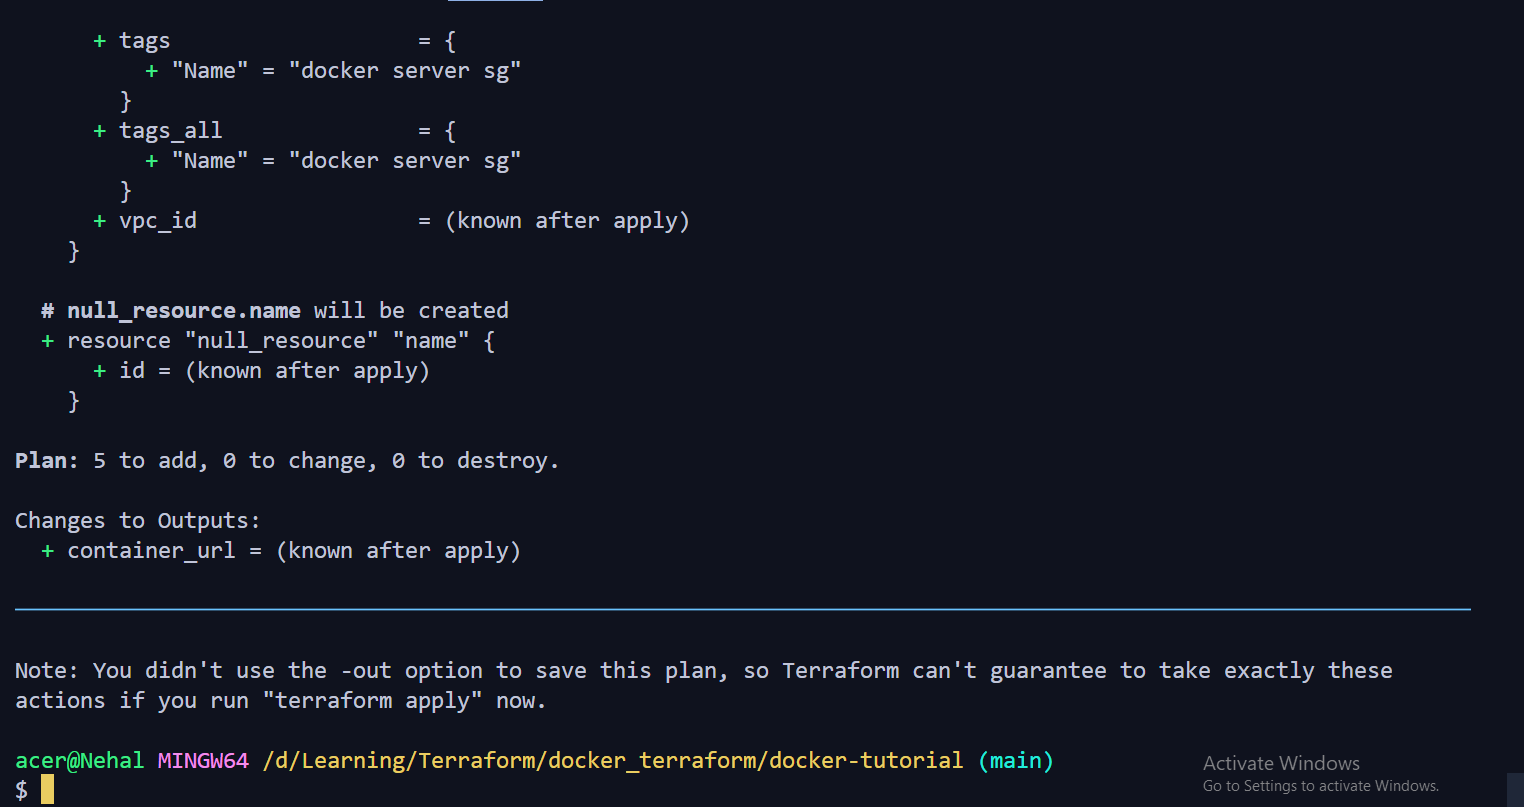
Terraform Plan
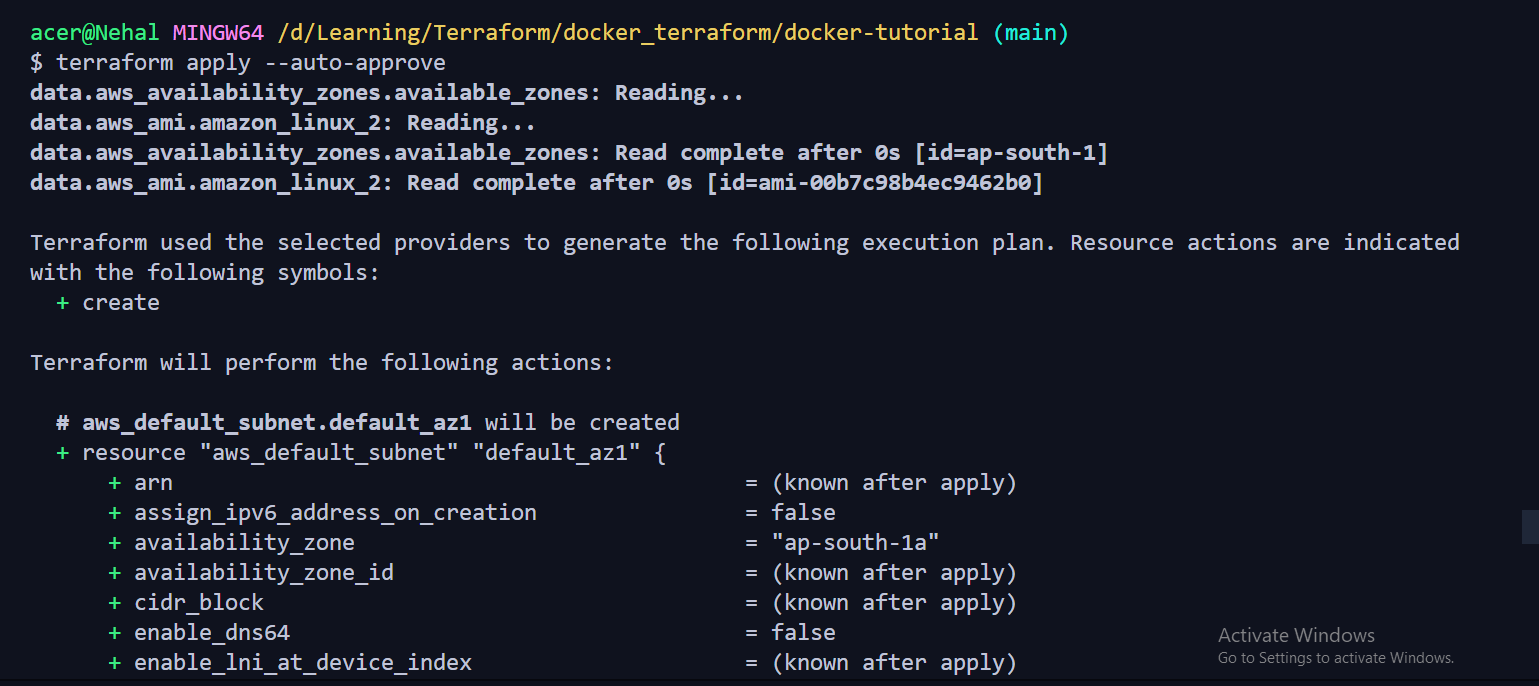
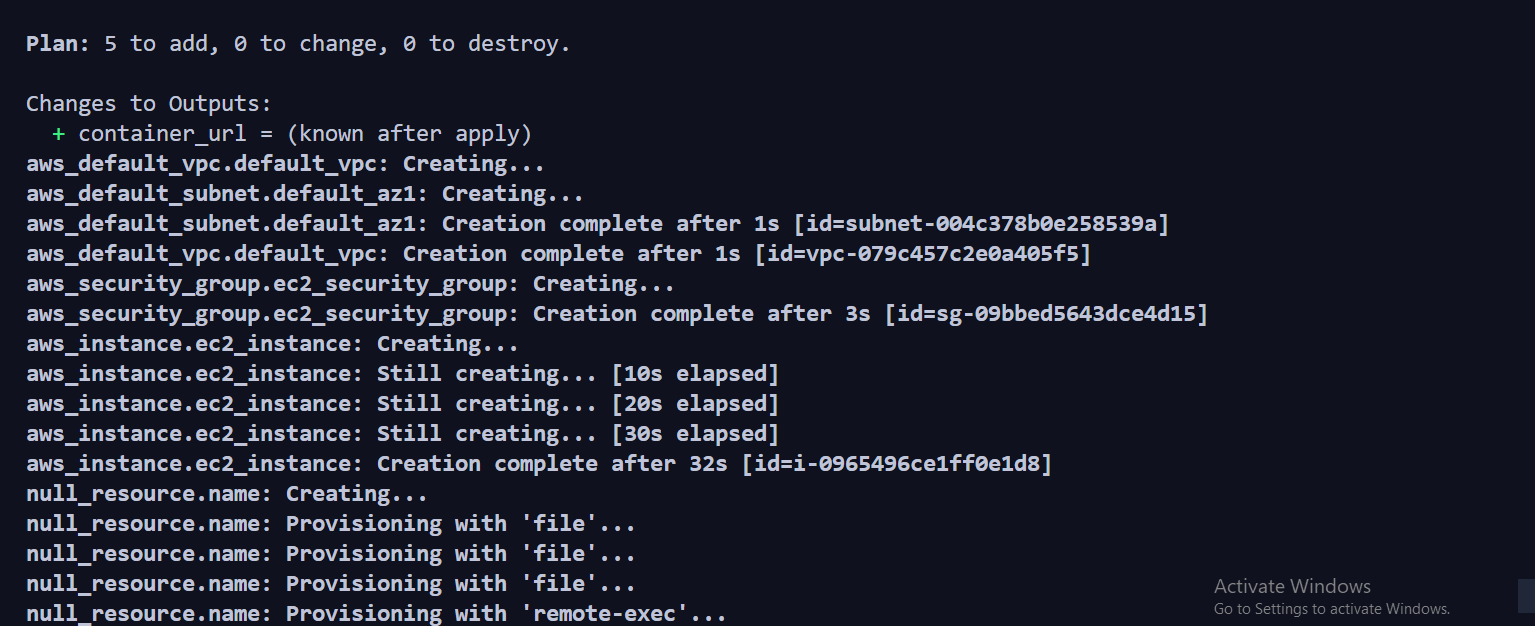
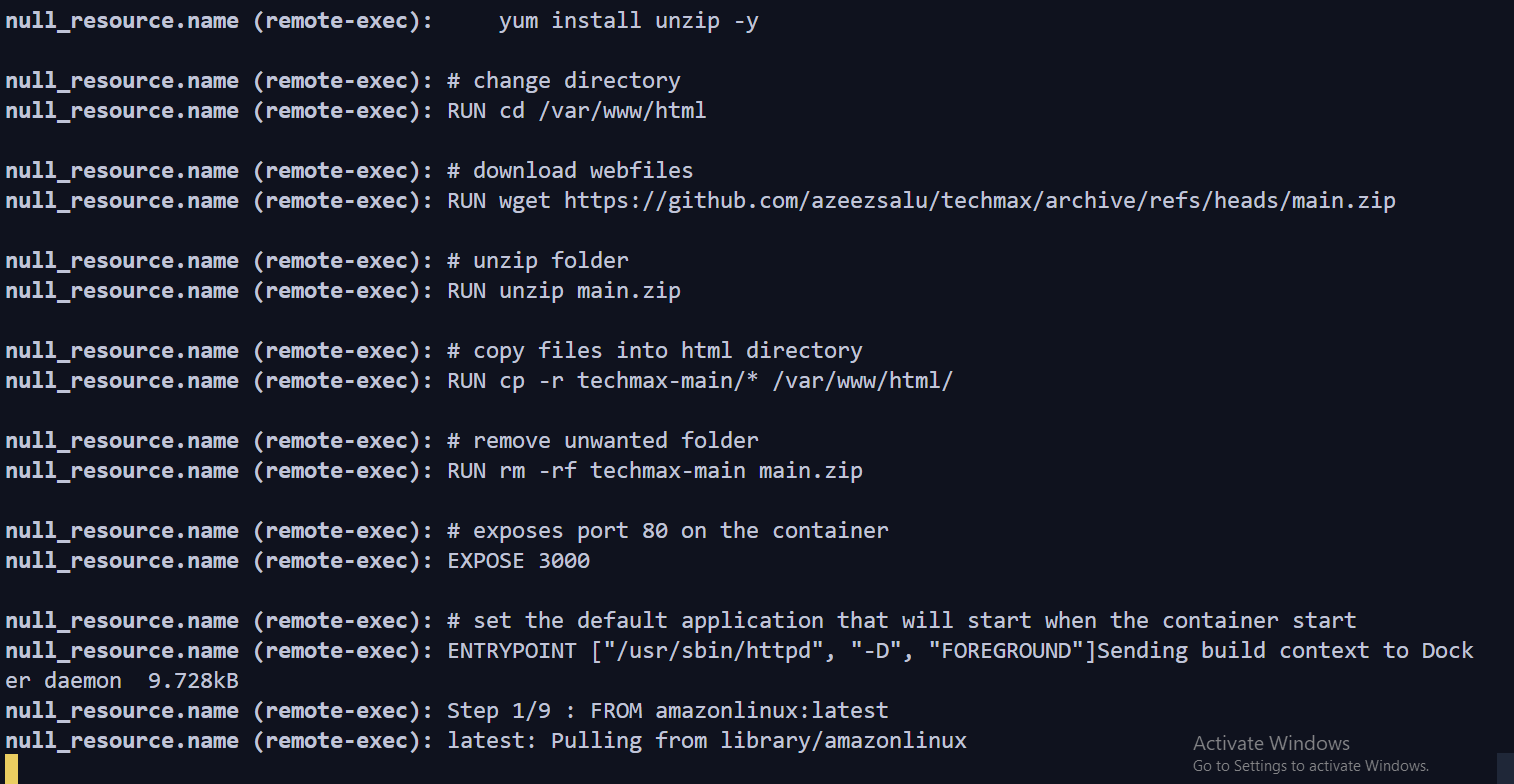
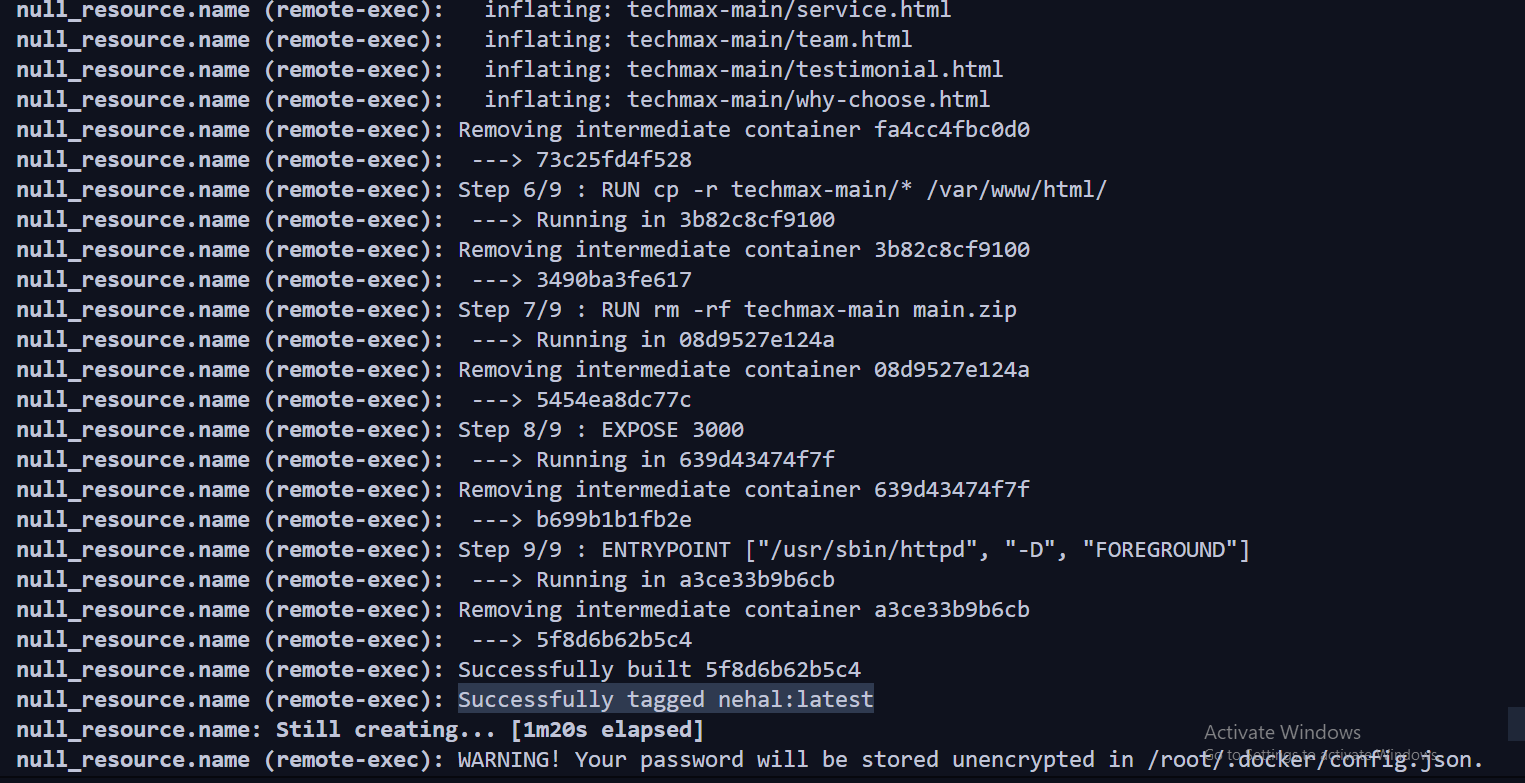
Terraform apply
AWS
Docker Hub
Docker image uploaded
Video
Conclusion:
Through this tutorial, we've illustrated a streamlined process for deploying a web application using Docker, AWS EC2, and Docker Hub. By creating a Docker image, pushing it to Docker Hub, launching an EC2 instance, and running the Docker image, we've showcased a seamless approach to deploying containerized applications in the cloud. This integration of Docker, AWS, and Docker Hub offers developers a powerful and efficient solution for deploying and managing applications with scalability and ease.
GitHub Link :- https://github.com/Ingole712521/terraform-aws-learning/tree/main/Day_4_docker_hub
Connect with us:
Hashnode: https://hashnode.com/@Nehal71
Twitter : https://twitter.com/IngoleNehal


